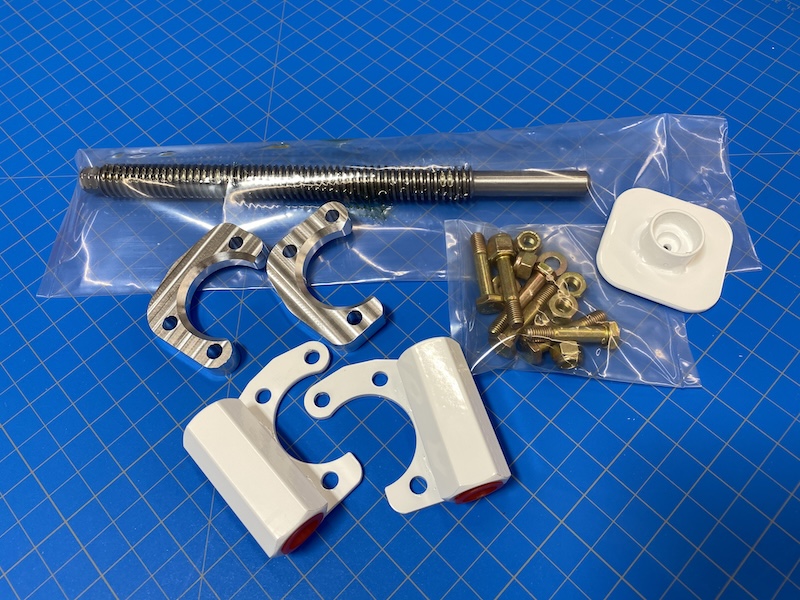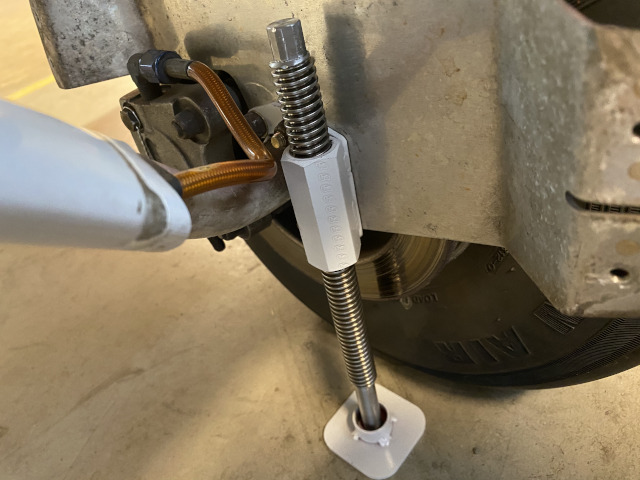
RV pilots that travel much are generally well equipped with a tool bag capable of fixing a flat. However, many of us struggle with a plan to lift the airplane. Those plans range from “I can always find help” to “I fly an RV-10 and carry my own wing jack”. For those in between, the Card Machine Works solution is the CMW E-Lift.
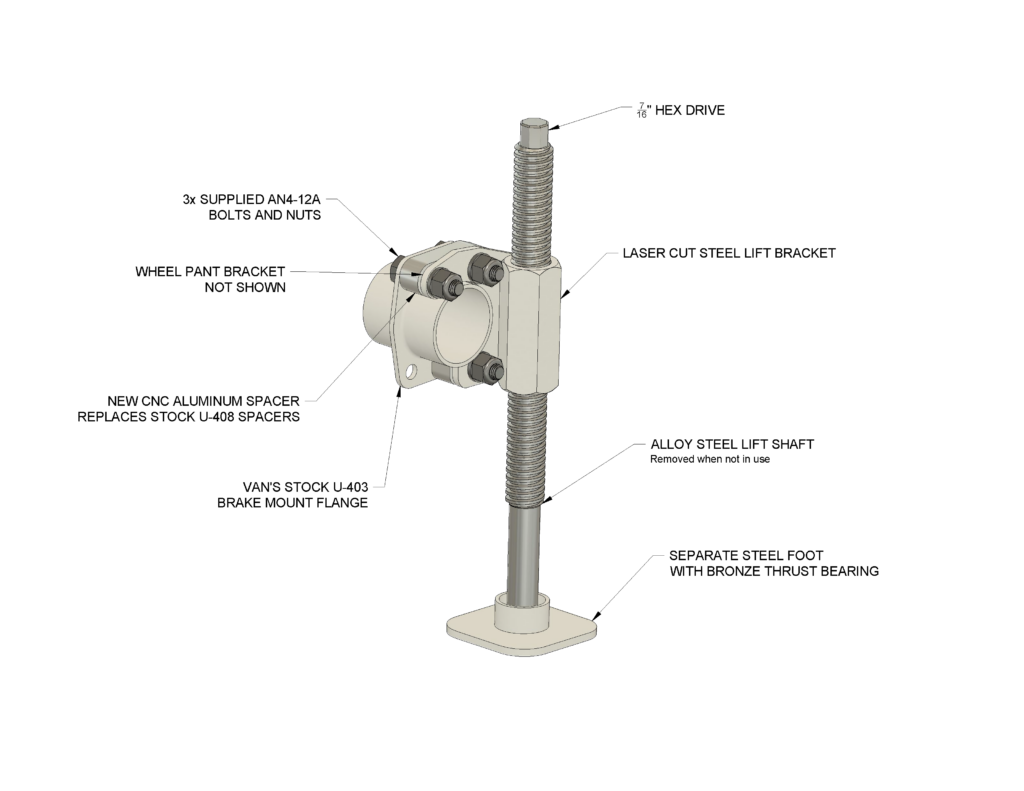
The E-Lift consists of a threaded lift shaft, a stabilizing foot, spacers, and a threaded bracket assembly that is bolted to each main gear. The bracket assembly is attached using slightly longer bolts through existing structure and CNC machined spacers (supplied with the kit), with no modification necessary. The bracket remains on the aircraft and weighs 151 grams per wheel. The shaft seats in a separate foot with a low friction thrust bearing. All steel parts are powder coated in a color that matches Vans powder coated parts.
The CMW E-Lift is intended only for emergency use and not daily hangar maintenance. One install consideration is the clearance of brake lines on your RV.

INSTALLATION
The CMW E-LIFT should be compatible with RV models 4, 6/6A, 7/7A, 8A, and 9/9A. Installers should reference Van’s drawing C2 and utilize Van’s part U-403 brake mount flange. There are two styles of brackets depending on which end of the airplane the little wheel is on.
1. Jack up the airplane using normal maintenance methods and remove the wheel pant and wheel.
2. Check that brake line routing will clear the new lift bracket. If not, brake line modifications may be necessary. This may be a good time to upgrade to a nice stainless flexible brake line.
3. Note the distance of the wheel pant bracket from the brake rotor. Remove the three wheel pant bracket bolts, wheel pant bracket (U-810) and spacers (U-408). The new aluminum spacer is sized the same as Van’s plans callout (13/32”).
4. Reinstall the supplied longer bolts (AN4-12a) with the new aluminum spacer.
5. Slide on the original wheel pant bracket. Ensure that spacing of the wheel pant bracket and brake rotor are the same as before. There may be differences in the original, builder made, spacers. Washers may be added if necessary.
6. Slide on the steel lift bracket and install washers and nuts.
USE
We recommend that the E-Lift be reserved for emergency field repairs. Otherwise, it may be used with care as a jack point with the lift shaft extended only an inch or two below the bracket in conjunction with a floor jack. The Van’s recommended lift point is still a wing jack.
Please use all normal vehicle lifting common sense: Lift only on flat level ground. Minimize the amount of time that the aircraft is solely supported by the lift and promptly place the axle on a solid block. Do not climb on or under an aircraft supported by the lift.
1. The upper 3” of the threaded shaft should be lubricated. We recommend storing it in a plastic bag with a medium grease so it will be ready to go when needed. A couple of drops from the engine oil dip-stick would be fine in a pinch.
2. Thread the shaft in from the top of the bracket already attached to the gear.
3. The shaft is turned with a 7/16 wrench or 6-point socket (12-point socket should not be used).

